
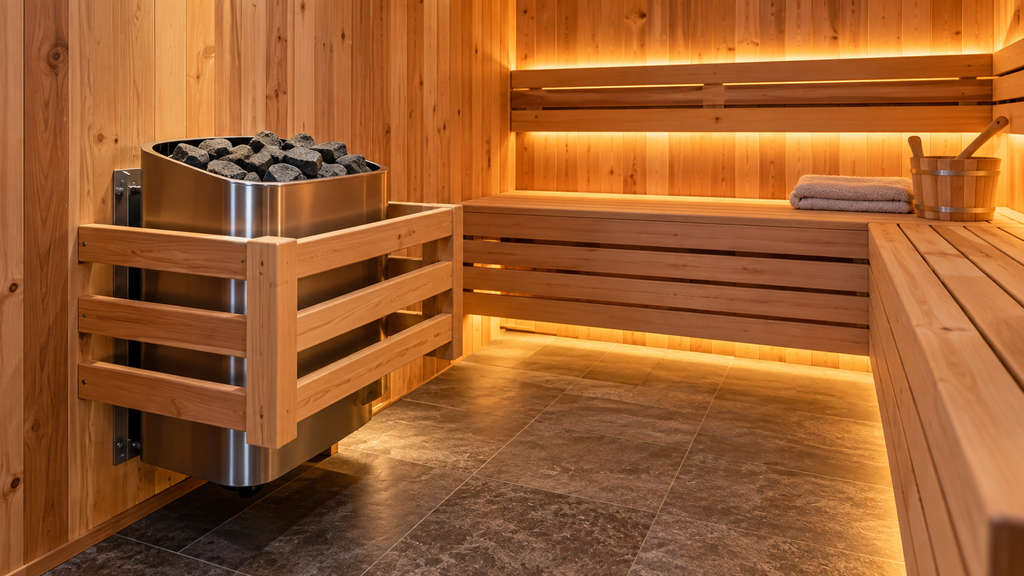
Installing a sauna heater is not simply a matter of choosing an open section of wall and connecting power. Heater size, mounting position, combustible-material clearances, temperature-sensor location, ventilation, sauna stones and the electrical supply all affect whether the sauna heats properly and operates safely.
The most important rule is simple: use the installation manual for your exact heater model as the final authority. Even heaters from the same manufacturer can require different side, front, floor and ceiling clearances.
This guide explains the decisions to make before installation, the measurements to verify and the common mistakes to avoid.
Affiliate disclosure: Sauna Handbook may earn a commission when you purchase through links on this page, at no additional cost to you. This does not affect which products we recommend.
Quick Answer: What Does Sauna Heater Installation Involve?
For a typical electric traditional sauna, installation planning includes confirming heater output against effective room volume, selecting a location that meets every required safety clearance, supporting the heater and stone load, providing the exact required electrical supply, locating controls and sensors correctly, coordinating ventilation, loading the specified stones and completing manufacturer-required testing.
The physical mounting may look straightforward, but this is a high-temperature electrical appliance in an unusual environment. Treat the manual, product listing and applicable code as requirements.
Use our Sauna Heater Size Calculator before choosing a heater, then review Sauna Electrical Requirements before electrical work begins.
1. Size the Heater Before Installation
Start with interior room volume: length × width × height. Then account for glass, masonry, tile and other uninsulated surfaces according to the heater manufacturer’s sizing method.
For example, HUUM’s North American DROP manual instructs installers to add 3.3 cubic feet of calculated room volume for each 1 square foot of uninsulated brick, tile or glass wall. That is a HUUM/model-specific instruction, not a universal formula.
Compare the adjusted room volume with the manufacturer’s approved range. See our Sauna Size Guide and Sauna Heater Size Calculator.
2. Choose the Location Before Finishing the Sauna
Decide heater placement while planning wall reinforcement, electrical routing, control/sensor wiring, ventilation, benches, guardrails, door swing and walking space.
A wall-mounted heater may require solid structural backing. HUUM states that the DROP weighs 143.3 lb (65 kg) with stones and requires a wall structure strong enough to support it. Do not assume finish paneling alone is adequate support.
Coordinate this work with your sauna insulation and vapor barrier and flooring and drainage plans before finishing the room.
3. Sauna Heater Clearances Are Model-Specific
There is no single standard sauna-heater clearance. Manuals may specify minimum distances from side and rear walls, benches, guardrails, floor, ceiling, the heater front and other combustible materials.
Current Harvia listings also show why clearance labels matter. The North American KIP60B 6 kW model lists a 2-inch front/side combustible-material safety distance. The North American KIP80B 8 kW listing lists 4.92-inch front/side distances labeled for non-combustible materials. These are different material categories, so the figures are not a like-for-like comparison and must not be used to infer KIP80B combustible-material clearances.
HUUM’s North American DROP manual likewise gives different safety-distance dimensions for DROP 4, 6, 7 and 9 models.
These are examples only—not dimensions to copy to another heater. Identify the exact model first and use its current safety-distance diagram.
4. How High Should a Sauna Heater Be Mounted?
There is no universal mounting height. Wall-mounted heaters typically have a prescribed bracket position or floor relationship; floor-standing and tower heaters differ.
Changing height can affect safety clearances, heat distribution, sensor behavior and bench relationships. Use the exact mounting dimensions in the model manual.
5. Plan Benches and Guardrails With the Heater
Required separation can apply to benches, bench skirts, wooden guards, handrails and accessories. A guard may reduce accidental-contact risk but cannot be placed inside a prohibited clearance zone unless the manufacturer permits it.
If a heater is designed to pass through a bench, use the manufacturer’s approved embedding method or accessories where required. Do not improvise a through-bench installation.
6. Temperature-Sensor Placement Matters
Many systems use a separate temperature sensor. Harvia says its sensor can also serve an overheat-protection function and warns that incorrect placement can contribute to overheating, poor performance or premature wear.
Correct placement depends on the heater. It may be wall- or ceiling-mounted at a precise relationship to the heater. Never use a generic “X inches below the ceiling” rule unless it comes from the exact system manual.
Harvia also warns that supply air too close to the sensor can cool it and distort its reading. Current Harvia guidance gives these examples:
| Supply-air configuration | Harvia minimum distance to sensor |
|---|---|
| Non-directional 360° valve | 1,000 mm / 39.4 in |
| Valve directed away from sensor | 500 mm / 19.7 in |
| Harvia SASPO105 diffuser | 350 mm / 13.8 in |
These are Harvia-specific examples, not universal dimensions. For the SASPO105 arrangement, Harvia also requires the diffuser and sensor to be on the same surface, with airflow directed away from the sensor.
7. Coordinate Ventilation With the Heater
Harvia’s current electric-sauna guidance says sauna air should change about six times per hour and distinguishes mechanical from gravity ventilation.
For gravity ventilation, Harvia says supply air should be below or next to the electric heater and exhaust near the floor as far from the heater as possible. Mechanical systems can use a different arrangement. Other manufacturers, including Saunum, publish layouts designed around their own systems.
Design heater location, sensor location and ventilation together. See our Sauna Ventilation Guide.
8. Electrical Work Must Match the Exact Heater
Verify rated voltage, phase, kW output, current/electrical table, required controls or power unit, circuit requirements and installation instructions.
Voltage alone does not determine breaker size, conductor size, disconnect arrangement or other requirements. A qualified electrician should install the electrical supply according to equipment requirements and applicable code.
Do not choose breaker or wire size from a generic internet chart. See Sauna Electrical Requirements.
9. Plan Controls and Power Units Before Walls Close
Some heaters have built-in controls; others use a separate controller and/or power unit. Before closing walls, confirm permitted control location, power-unit location, sensor-wire routing, any remote-operation safety devices and which components may be inside the hot room.
Do not assume every controller can be installed inside the sauna.
10. Use the Correct Sauna Stones
Use the stone type, size and quantity specified by the heater manufacturer. Do not substitute decorative landscaping rocks.
HUUM recommends stones specifically intended for sauna heaters and warns against decorative stones. Current Harvia KIP specifications for the cited models list approximately 5–10 cm stones.
11. Load Stones Without Blocking Airflow
HUUM currently instructs users to wash stones, place them individually rather than dump them, begin with larger stones, use smaller stones to fill gaps and preserve space for air circulation.
Follow the exact heater instructions. The goal is not to pack the heater into a solid mass.
12. Wall Protection Does Not Automatically Reduce Clearances
Tile, noncombustible board or an improvised heat shield does not automatically permit reduced clearances. Use only a clearance-reduction method specifically allowed by the heater instructions and applicable code.
13. Common Sauna Heater Installation Mistakes
Common mistakes include choosing the heater after the room is finished, copying another model’s clearances, ignoring loaded heater weight, placing the sensor wherever convenient, putting supply air too close to the sensor, packing stones too tightly, assuming a heat shield solves clearance problems, treating sauna wiring as generic 240V work and forgetting service access.
14. Sauna Heater Installation Checklist
Before installation confirm:
- exact heater model and current manual;
- heater output matches effective room volume;
- structure supports heater plus stones;
- every required clearance is confirmed;
- benches/guards respect clearances;
- electrical requirements have been reviewed appropriately;
- controls and power-unit locations are planned;
- sensor location is marked from the model instructions;
- ventilation will not interfere with the sensor;
- correct stones and quantity are available;
- service access remains available; and
- permit/inspection requirements have been checked where applicable.
15. Should You Install a Sauna Heater Yourself?
Carpentry/assembly and electrical connection are different questions. A capable homeowner may be comfortable with permitted assembly work. Electrical connection of a high-output heater should follow local requirements and manufacturer instructions, typically through a qualified electrician.
If the manual or jurisdiction requires professional installation, licensing or permits, follow those requirements.
16. An Installation Order That Avoids Rework
A practical sequence is: calculate effective volume; choose the exact heater; obtain its current manual; lay out heater, benches, door and clearances; plan ventilation and sensor location together; add structural support; plan electrical/control wiring before closing walls; finish the interior without violating clearances; install heater/controls per the manual; load specified stones; and complete required inspection/testing.
Still choosing? Compare models in Best Sauna Heaters and confirm output with the Sauna Heater Size Calculator.
Frequently Asked Questions
How far should a sauna heater be from the wall?
There is no universal distance. Use the safety-distance table or diagram for your exact heater.
How high should an electric sauna heater be mounted?
Use the model-specific mounting dimensions. Wall-mounted, floor-standing and tower heaters differ.
Can a sauna heater touch a wood wall?
Only install it at the distances and against surfaces permitted by its instructions. Wood paneling does not eliminate combustible-material clearance requirements.
Where should the temperature sensor go?
In the exact location specified by the heater/control manufacturer. Keep ventilation from interfering with it.
Does the air vent go above or below the heater?
It depends on the ventilation method and system. Harvia, for example, places gravity-ventilation supply air below or next to an electric heater; mechanical layouts can differ.
Can I install a heater under or through a bench?
Only when the heater is designed/listed for that installation and all required clearances and approved accessories are used.
Do sauna stones need to be washed?
HUUM specifically recommends washing stones before loading to remove dust. Follow your heater manufacturer’s instructions.
Can I use regular rocks?
Use sauna-heater stones of the type/size specified by the manufacturer. Decorative or unknown rocks may fracture or perform poorly.
Does a sauna heater need a dedicated circuit?
Many electric heaters do, but exact requirements depend on the model. Follow the electrical instructions and local code.
Final Takeaway
Good sauna heater installation starts before the heater reaches the wall. Choose the exact heater first, confirm room sizing, build around its clearances, coordinate benches, ventilation and sensor placement, provide the specified electrical system and load the correct stones.
When generic advice and the current heater manual differ, follow the manual.